Water exposure zones
Separate dry surfaces, splash areas around the basin and continuously wet shower areas. The same stone and finish can behave differently in each zone.
ROYALSTONE GUIDE · BATHROOM
Water, geometry and sanitaryware first. Stone, pattern and edges second.
In a bathroom, stone works as part of a system with waterproofing, cabinetry, sanitaryware, drainage, sealants and ventilation. This guide helps coordinate that system before slab cutting: vanity top, basin, shower, wall cladding, the details that must be surveyed and the information needed for a useful estimate.
A coordinated bathroom plan prevents more rework than choosing a beautiful slab too early. Mark water exposure, fixtures, cabinetry, penetrations and installation sequence first.
Separate dry surfaces, splash areas around the basin and continuously wet shower areas. The same stone and finish can behave differently in each zone.
Fix the basin, tap, shower system, drain or channel models. Actual drawings or templates are needed for critical cut-outs and holes.
Before cladding, define the substrate, waterproofing line, corners, thresholds, niches and service penetrations.
The vanity, frame, brackets and support points determine dimensions, overhangs, thickness strategy and safe cut-out locations.
For expressive marble, quartzite or onyx, vein direction and seams should be approved on a slab image or layout before cutting.
Check doors, lift, stairs, turns, weight and working space. Large pieces must be designed around real access and installation conditions.
Stone family is only the first filter. The decision should be based on the actual slab, finish, use zone, cleaning chemistry and construction detail.
Natural stone is the finish layer. Shower and wet-area reliability depends on the prepared substrate, waterproofing, drainage, junctions and compatible installation materials behind it.
In showers and other wet zones, water management is designed in the assembly behind the stone rather than relying on the stone surface or grout joint.
Drain/channel location, finished levels and falls should be coordinated before stone fabrication so water has a predictable route.
Wall-to-floor, wall-to-vanity, tray-to-wall, niches and thresholds need a coordinated detail and resilient junctions where the system requires them.
Tap bodies, shower rails, jets, traps and other penetrations should be located on the drawings before fabrication.
Do not hide structural or movement zones randomly inside a stone pattern. The layout must respect substrate movement and service details.
Visible sealant can age and require replacement. It should not be the only line of defence against water reaching the construction.
Most avoidable mistakes come from cut-out geometry, edge clearances, unfinished cabinetry or missing sanitaryware data rather than the stone selection itself.
Vessel, undermount, integrated and drop-in basins have different cut-out geometry, edge finishing and support requirements.
Use the manufacturer drawing or the actual basin. A nominal catalogue diameter is not a fabrication template.
Count, diameter and spacing should be checked against the tap body, supply connections, mirror and installation access.
Edge profile, laminated build-up, chamfer, wall ends and exposed sides should be agreed before fabrication.
Cabinetry must be set in the final position and suitable for the agreed assembly. Large overhangs and heavy elements require separate support review.
Tile, stone backsplash, mirror and sealant line need a clear installation sequence.
A shower is not only about the stone appearance. Falls, drainage, surface texture, threshold, joints, cleaning and trap access need to be considered as one detail.
Fix the model, size, height and position before the stone drawing is finalised.
Tray or floor geometry should provide the project-defined drainage path without accidental low spots.
No finish is universally “non-slip” in every condition. Consider the stone, texture, water, soap, maintenance and project requirements together.
Finished levels of the shower, glass, door and adjacent floor must be coordinated with waterproofing and drainage.
Piece size, joint count and vein layout must work with falls, drainage and installation access.
Allow drain access, cleanable corners and a realistic care routine for the selected finish.
Large slabs can make a bathroom feel continuous, but they require precise planning of penetrations, corners, niches, vertical joints, fixing and installation sequence.
Adjacent panels can be mirrored or sequenced. Approve the layout before cutting.
Coordinate niche depth, falls on horizontal surfaces, edges, lighting and waterproofing before fabrication.
Taps, flush plates, sockets, lighting, towel rails and access panels must be tied to the real wall geometry.
Internal and external corners can be detailed in different ways; visible pattern, thickness and joint strategy should be agreed in advance.
Large panels require a suitable substrate, compatible fixing/adhesive system and an installation plan for their format and location.
Do not permanently cover equipment or inspection points without an access strategy. Removable panels and access hatches are planned before cladding.
Final survey should follow the real, sufficiently fixed geometry rather than an early design drawing. Fewer changes after survey mean less risk of stone rework.
Cabinetry, support and countertop levels are fixed in their final position.
Finished wall build-up is known; critical planes are complete or accurately established.
Basin, taps, drains/channels and shower glass are confirmed and drawings/templates are available.
Floor level, thresholds, vanity top, upstands, niches and joint lines have final elevations.
Electrical, plumbing, fixings, access points and other penetrations have real coordinates.
Delivery route, turns, lift, stairs, staging area and installation sequence are confirmed before large pieces are fabricated.
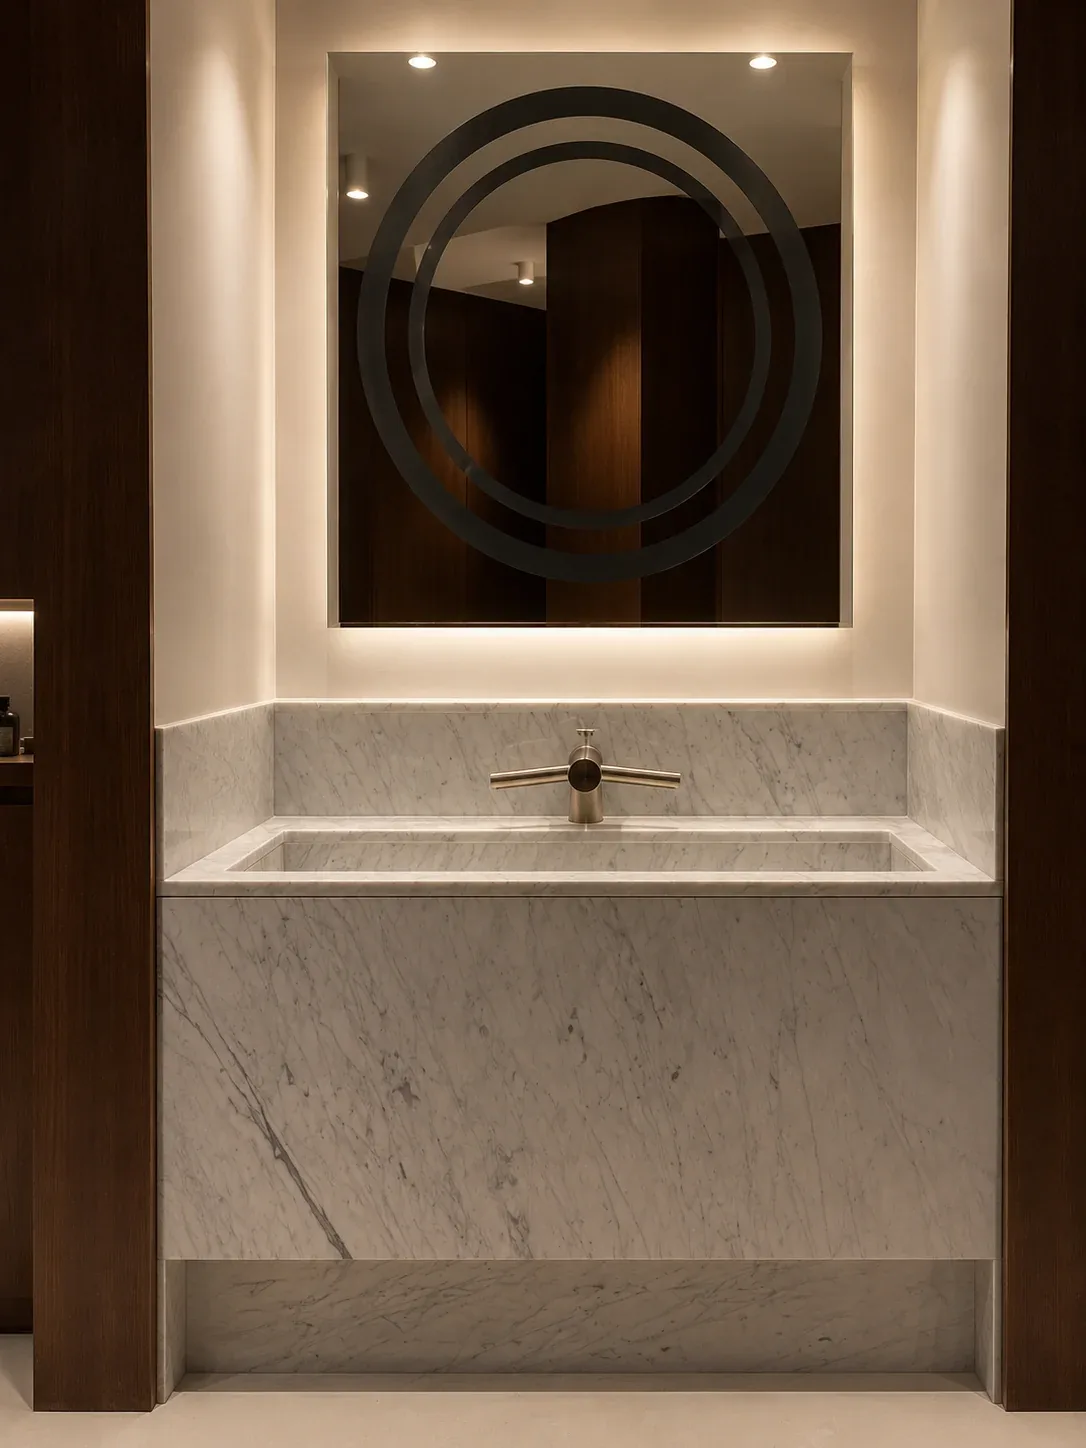
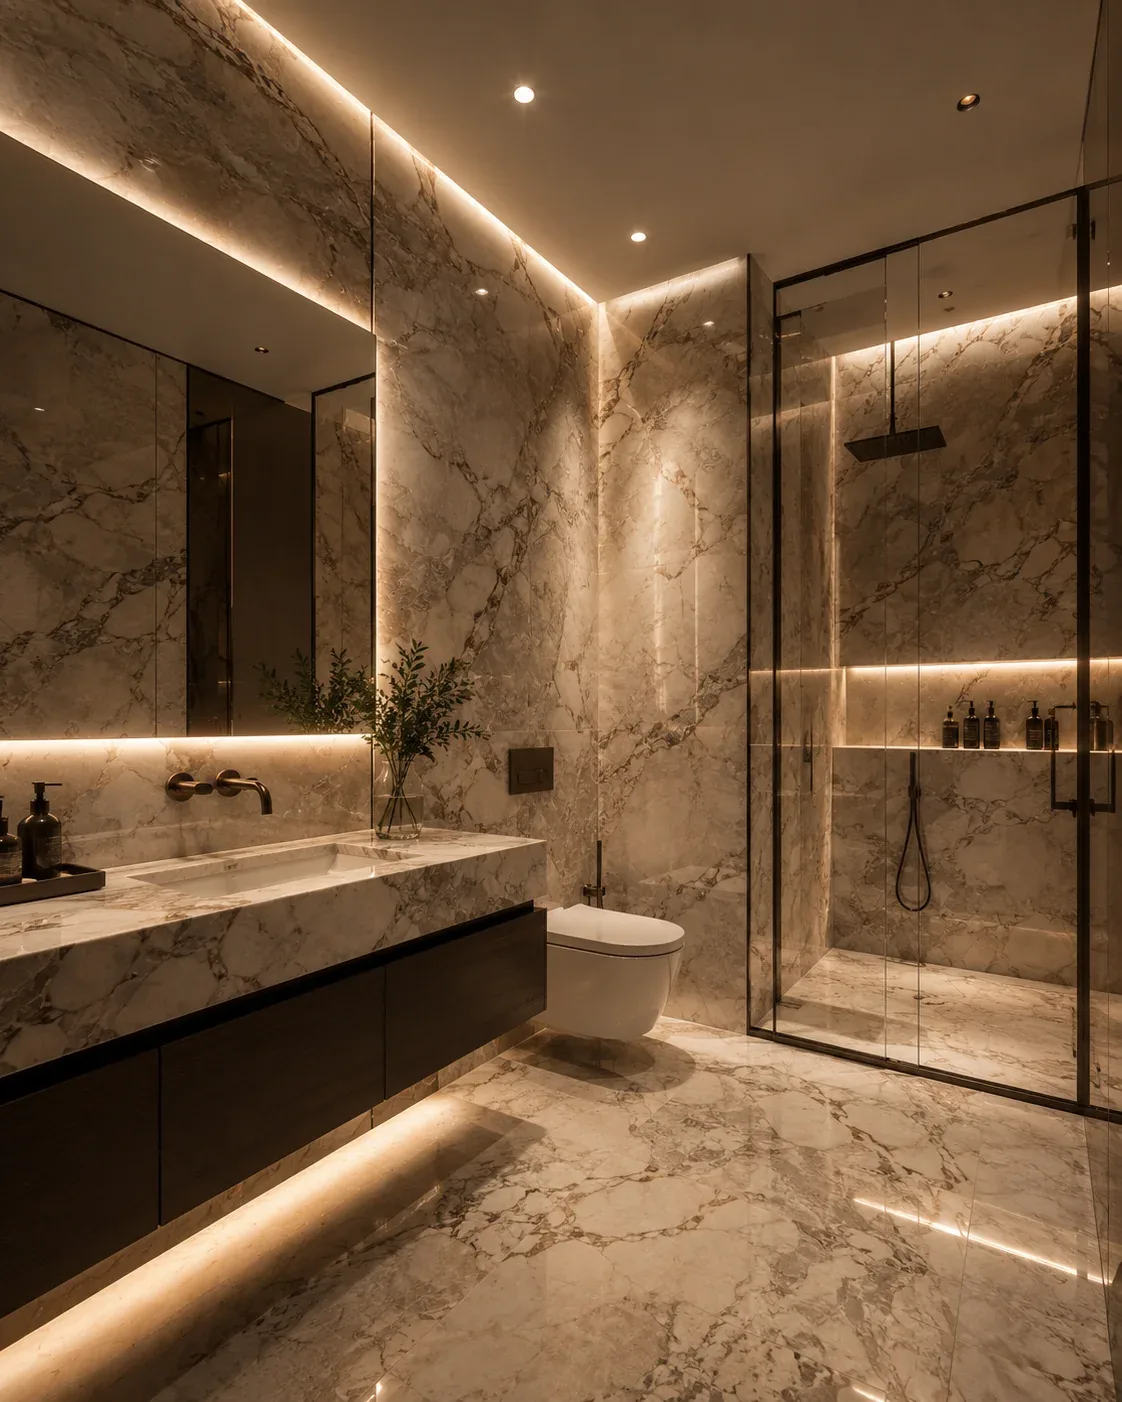
These verified RoyalStone images show a finished washbasin, marble bathroom wall cladding and the fabrication stage of an integrated stone basin — different parts of the same journey from layout to installed detail.
A completed stone washbasin. Similar details require accurate basin geometry, holes, edges, support and sealing coordination.
Open bathroom portfolio ↗Large panels with natural movement. Layout, corners, penetrations, niches, waterproofing and installation sequence are coordinated before cutting.
Open project ↗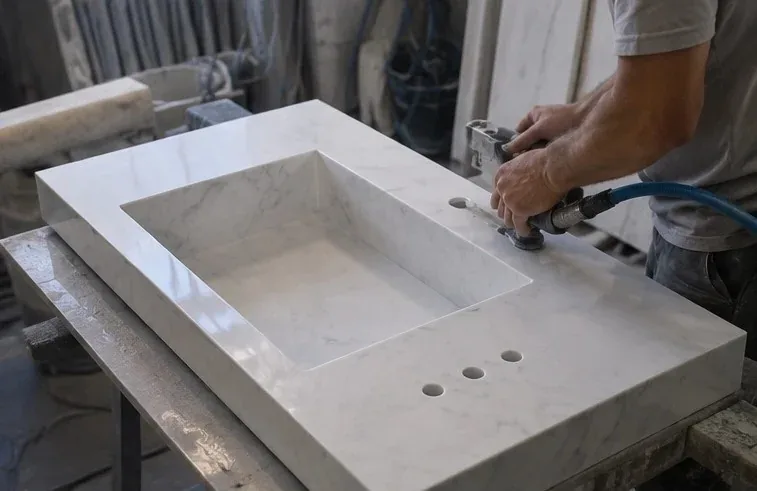
The fabrication stage shows why sanitaryware geometry, drainage, internal joints and edges should be resolved before bonding and final finishing.
View completed work ↗A useful estimate is not based on stone area alone. It includes the actual slab, cutting yield, fabrication, cut-outs, details, logistics and installation.
Price depends on stone type, actual batch, slab format, pattern selection and cutting yield.
Vanity top, upstands, wall panels, shower tray, shelves, niches and visible ends all have different fabrication effort.
Basins, taps, drains, sockets, installation plates and radii add operations and dimensional control.
Edge profile, lamination, polishing/honing, textured finish and local hand finishing are priced from the actual scope.
Access, seam count, junctions and coordination with other trades affect installation effort.
If substrate, waterproofing, drainage, glass, cabinetry and sanitaryware must be coordinated, that work should be resolved before stone fabrication starts.
Care depends on the exact stone and finish. An impregnating sealer can improve stain resistance, but it does not make stone “waterproof” and does not replace wet-area waterproofing.
For routine natural-stone cleaning, use products suitable for stone, typically pH-neutral, with a soft cloth or sponge.
Lemon, vinegar and acidic cleaners can etch calcite stones such as marble and travertine. Cleaning chemistry should match the actual stone.
In a shower, removing water with a squeegee after use can reduce soap and mineral build-up.
An impregnator does not make the surface stain-proof. Need, product and reapplication interval depend on the stone, finish and manufacturer guidance.
Resilient joints and visible sealants should be inspected periodically; damaged areas are maintained before water can enter the detail.
Do not mix household cleaners. For difficult staining or etching, identify the problem first and use a method suitable for the specific stone.
A compact technical pack makes the first estimate much closer to the real scope. Final fabrication dimensions are still confirmed by survey.
Go directly to the commercial or technical page that matches your next decision.
It can be considered, but the exact stone and finish, waterproofing system, falls, drainage, joints, sealing and maintenance regime need to be reviewed together. Stone itself is not the waterproofing layer.
It depends on the design, actual slab, care expectations and exposure to cosmetics/cleaners. Marble offers classic veining but is acid-sensitive; quartzite is often considered for higher hardness. Final selection should be made on the actual material.
Not every stone needs the same treatment. Some benefit from an impregnator while others may not require one. Impregnation can improve stain resistance but does not make the stone waterproof.
It can be designed when finished levels, falls, drainage, waterproofing, glass and adjacent floor are coordinated as one system before stone fabrication.
When the vanity and supports are in their final position, wall build-up is fixed and the basin and tap models are confirmed.
Some site cutting may be possible, but the fabrication plan should identify critical penetrations, safe clearances, tool access and risk to the piece in advance.
There is no universal answer. Consider the exact stone, required traction, water, soap, cleaning, appearance and project requirements.
Use products compatible with natural stone and avoid acidic cleaners on calcite stones. Difficult staining or etching should be correctly diagnosed before treatment.
Send dimensions/plan, photos, stone areas, sanitaryware models, preferred material or references, site address and renovation stage. That is enough for an initial estimate and survey checklist.
These sources support general care, impregnation and wet-area planning principles. The exact stone, adhesives, waterproofing, sealants and construction details must be confirmed for the specific project and manufacturer system.
ROYALSTONE · KYIV
Send the plan, photos, sanitaryware models and approximate dimensions. RoyalStone can split the scope into vanity top, basin, shower, walls and technical details, select suitable stone options and prepare the project for a reliable survey and estimate.